
Verify The Data Plane
As our last test in previous post https://old.smenode.com/adding-a-default-route/ regarding the basic core functionality of the firewall. Let’s put a pc behind the firewall and make sure that pc has access out to the public internet as well. So in our topology:
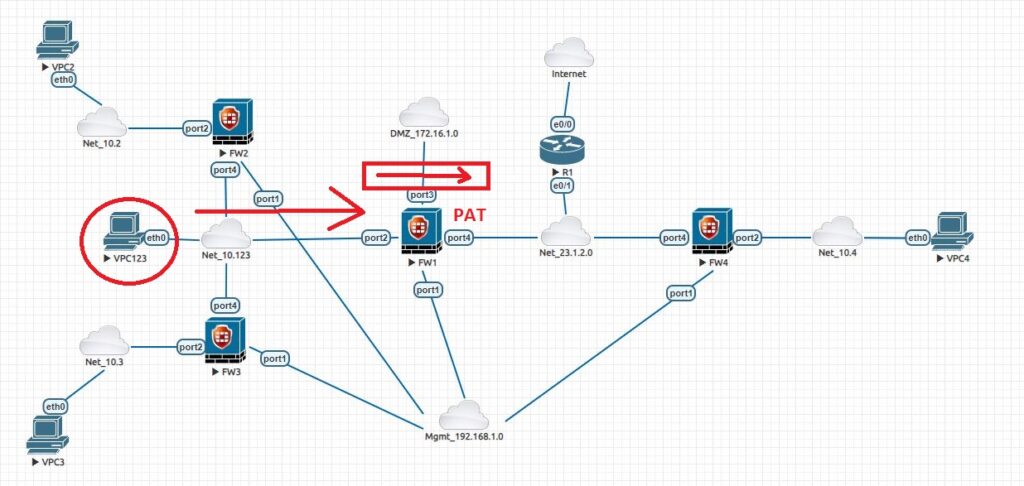
We will make sure the VPC123 has an ip address and default gateway that points to 10.123.0.71. Also, very important on FW1 it has by default a security policy that Deny everything. So, we are going to set a security policy the basically says, allow everything. Because this device is coming from an address in a private area and going to internet base, we also going to tell this firewall part of its rule to go ahead and do port address translation PAT.
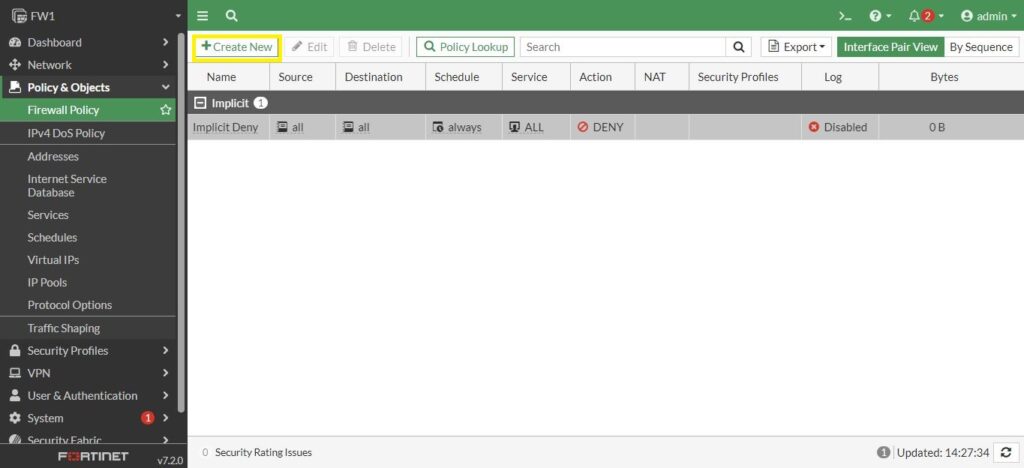
So, let’s go to the firewall. Click on Policy and Objects and the first option is Firewall Policy. It has an Implicit Deny policy which says NO to any traffic. Don’t forget that this policy is for data plane traffic that is trying to go through the firewall.
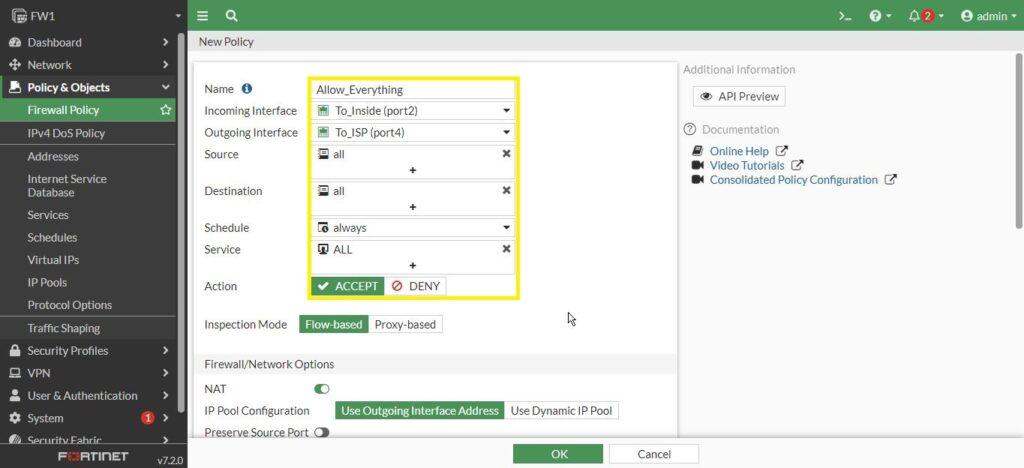
We are going to click on Create New to create new security policy. I call it Allow_Everything, Incoming traffic comes in from Port2 and try to be routed out of Port4. We are going to have a whole discussion about security policy in next posts. But, for now, we want to create very simple policy that says allow everything. So, for Source, Destination and Service, we are going to say all. Whether client use ping, http, icmp, https or some other protocol is all going to be allowed by this security policy. The Action is Accept.
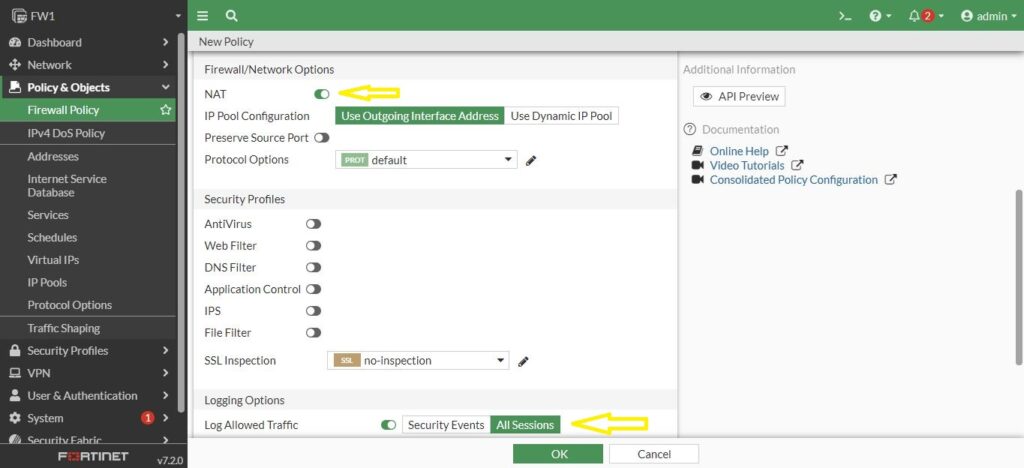
By default, the NAT option is enabled which means that is affectively is going to do port address translation behind the scene. Everything comes swap up the source address of the client and replace it with its public valid address on the out-band interface. That is Port4 which is 23.1.2.72 address. I’m going to turn logging for All Sessions not just for Security Events for the trouble shouting. Then click on OK.
Fantastic, now we have a security policy. The routing decision is made first and then considered the security policy and see is whether or not its willing to allow the traffic to flow.
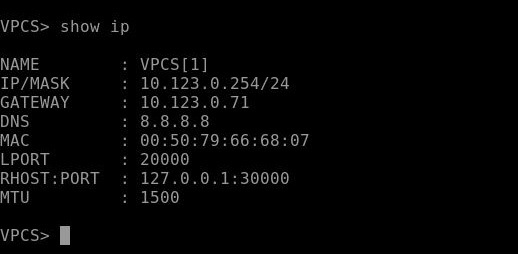
It depends on your lab and which virtual pc you use for your PC. But generally we set 10.123.0.254 for the ip address and 10.123.0.71 for the default gateway and 8.8.8.8 for the DNS.
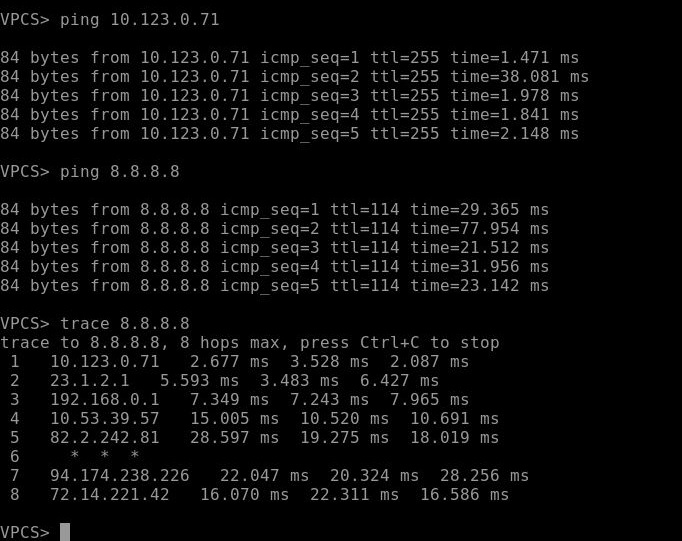
So first of all, ping the default gateway, then ping the 8.8.8.8. After that traceroute the 8.8.8.8 to make sure about the routing. It shows the traffic is going through the firewall. Life is good.
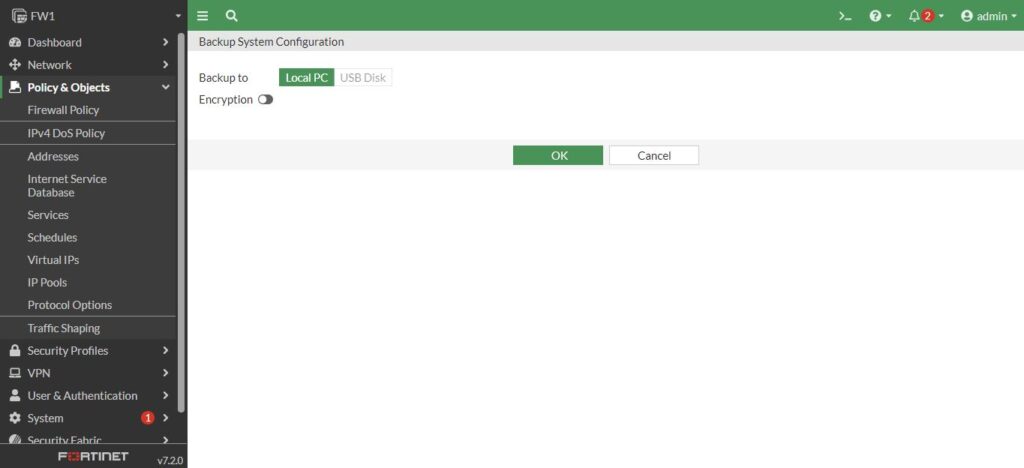
So we are going to have a snapshot from the firewall or save a backup. Go to the admin on the right corner then click on Configuration and select Backup. You can set the password by enabling the Encryption and save to the USB or Local PC. I save without password and on my local PC.

Then Save the backup file:
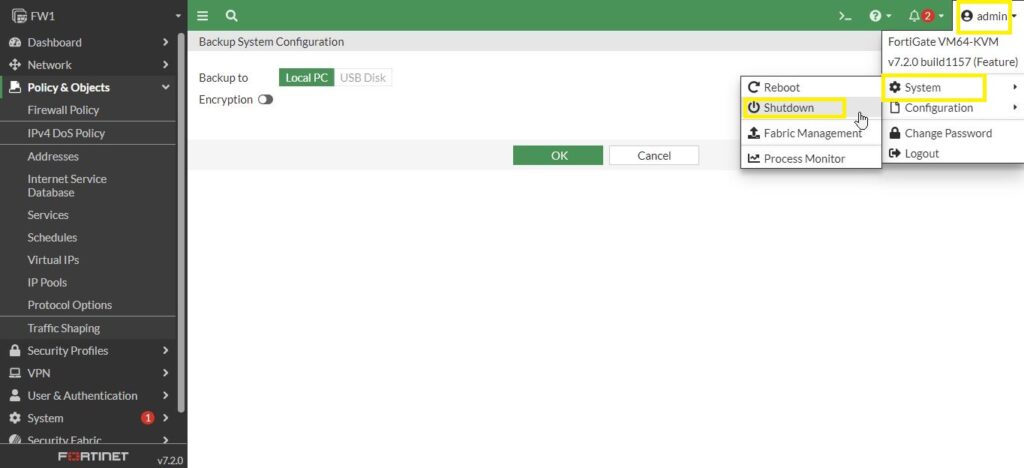
You can Shut down the firewall for taking the snapshot if you use virtual firewall on ESXi from the admin->System->Shutdown path.
I hope this would be informative for you. We will talk about routing and routing protocols in the next posts.
