
Fortigate Network Configuration
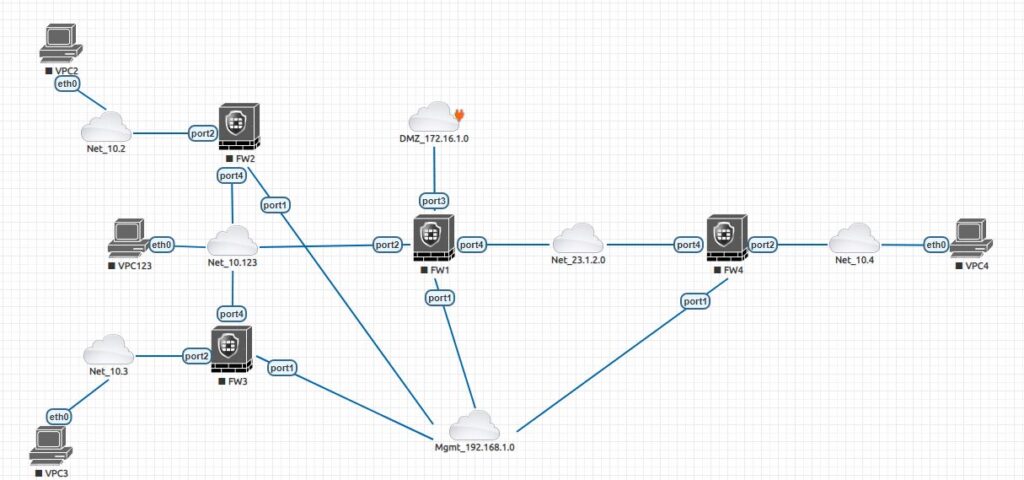
In the previous lesson https://old.smenode.com/fortigate-initial-configuration/ we learnt about initial configuration of fortigate. In this post we are going to know how to configure the network interfaces and set the default route. So, the below picture is our topology and lab. Let’s config the rest of firewalls.
LAB Overview
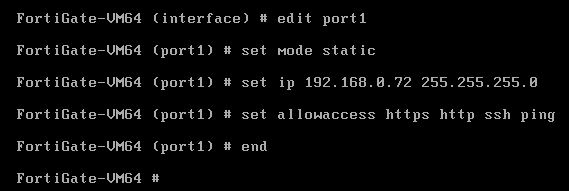
In first step, we are going to configure the FW2. Port1 is the Management, then we set the 192.168.0.72/24 ip address.
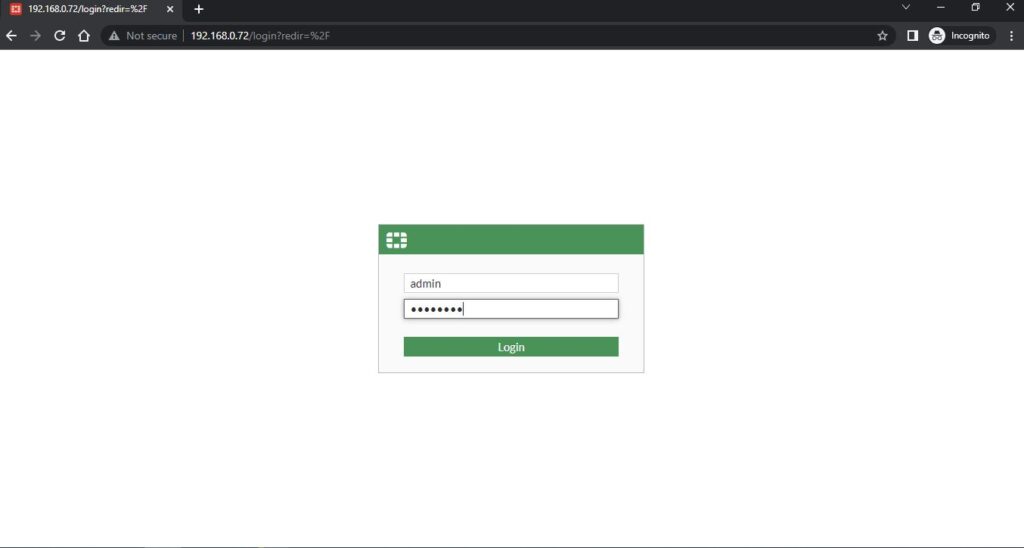
So, login with default credential which is “admin” for username with no password and then set new password.
After that, as we discussed before, config system interface syntax.

Then with show command:
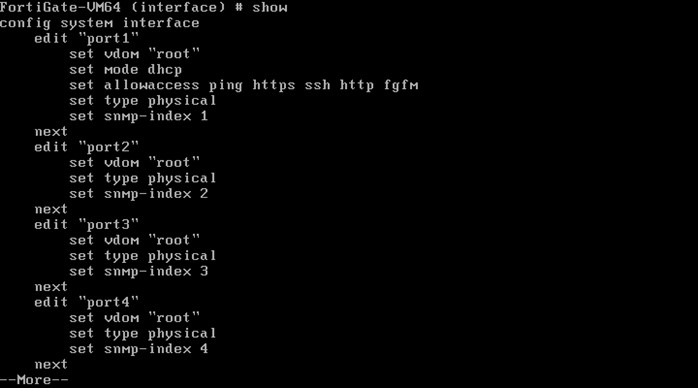
We can see Port1 is in DHCP mode, so, change it to static mode and set the ip 192.168.0.72 with /24 prefix and set allowaccess with http, https, ping and ssh.
And let’s do the same treatment for firewall 3 and firewall 4 with the management 192.168.0.73 , 192.168.0.74 ip addresses. I have done that and assume it can be a good practice for you to configure it by yourself.
So, from CLI we have bootstrap and put the initial ip address on the management interfaces for firewalls 1,2,3 and 4. Let’s go to GUI and configure the data plan interfaces as well. You can configure the interfaces at the CLI if you want it too, either way is perfectly fine. So, let’s configure these in the same order, and start with firewall 2.
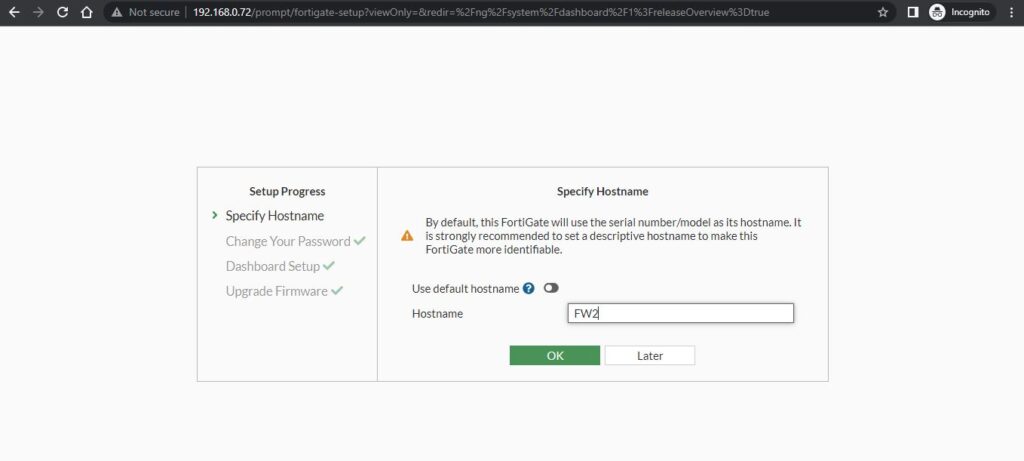
All right, so it is the firewall 2 GUI with 192.168.0.72, type username and password which we created in CLI. After we click on “Begin” , we’ll named of FW2 and click on every following “ok” bottoms.
And
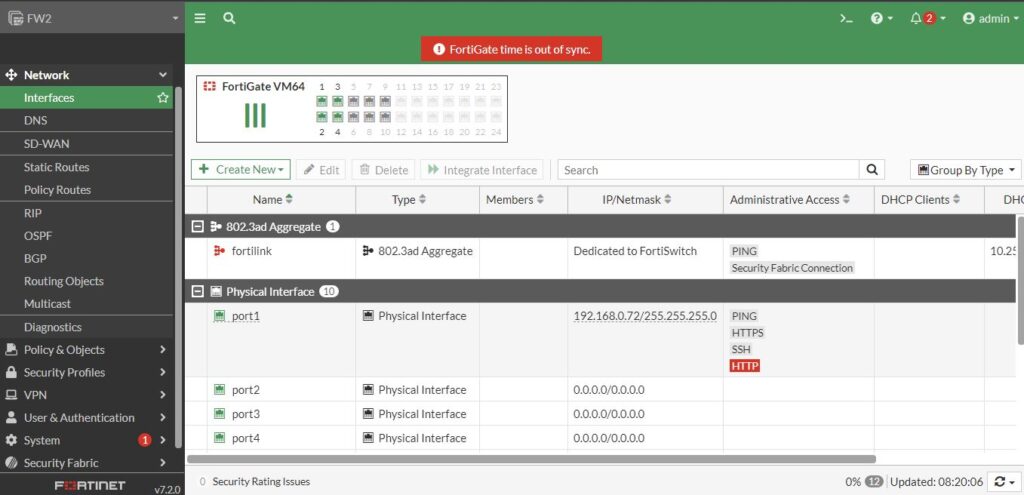
After a quick look at our topology, so for FW2 we have Port4 is connected to 10.123.0.0/24 Network and Port2 is connected to 10.2.0.0/24 network. So in the left side we click on Networkand then Interfaces and lets do interface Port4 first. Double click or right click on Port4 either way is great:
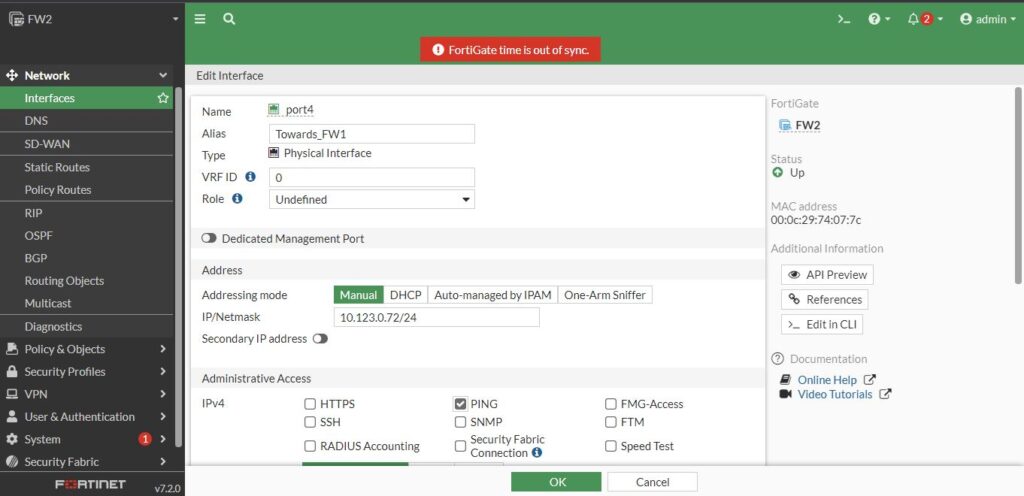
We set alias “Towards_FW1” that has an idea which the interface goes to, and the 10.123.0.72 with a 24-bit mask for the ip address, and give the Ping access, so leave everything else to default, then click ok.
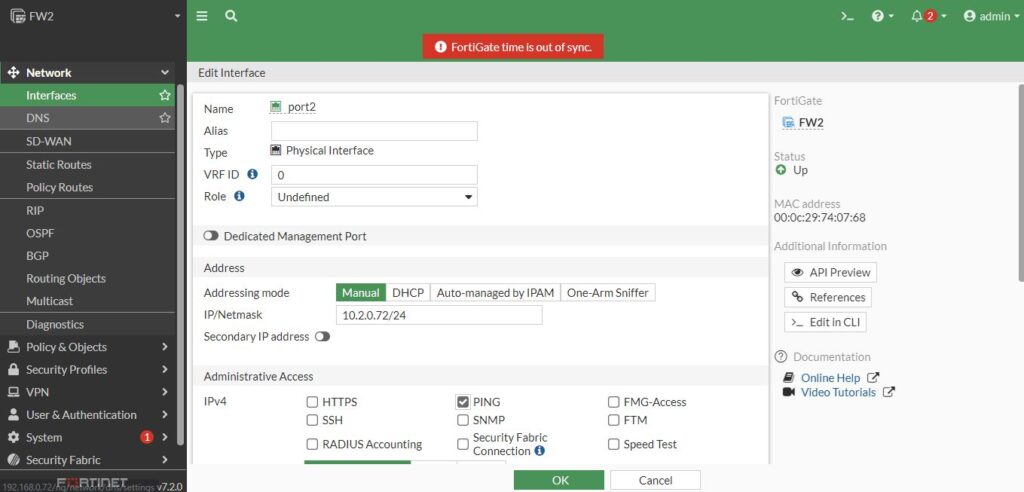
Port4 is done, let’s do the Port2. Its ip addressed 10.2.0.72 with 24-bit mask. And like Port4 with Ping access.
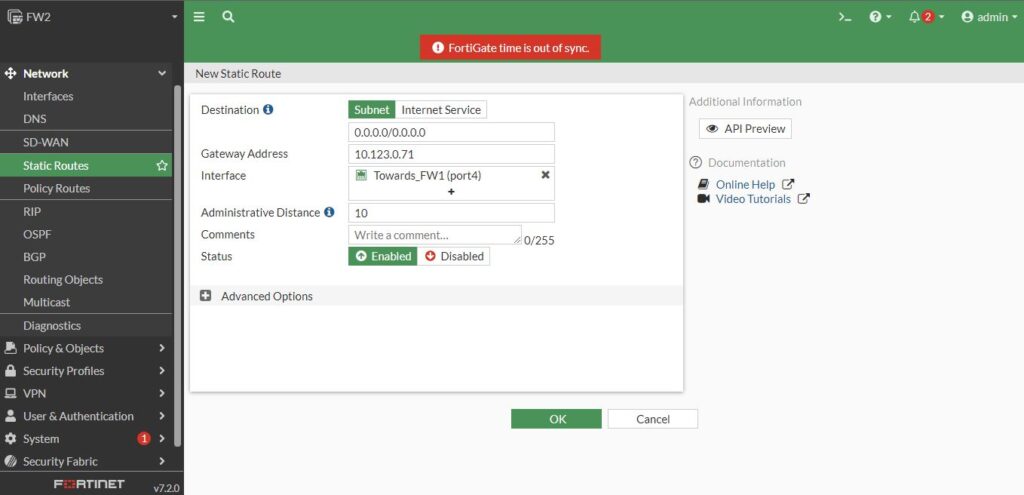
Next is to set default route in order to connect FW2 to the internet. Let’s take a look at topology. So from FW2 prospective default route next hob would be FW1 Port2 interface ip address which is 10.123.0.71. So let set static route. Click on Static Routes under Network, click on Create New and there is a syntax for default route (0.0.0.0/0.0.0.0) and the Default Gateway is our next hob and is going to use Port4 because port4 is the local interface that can reach the next hob (FW1).
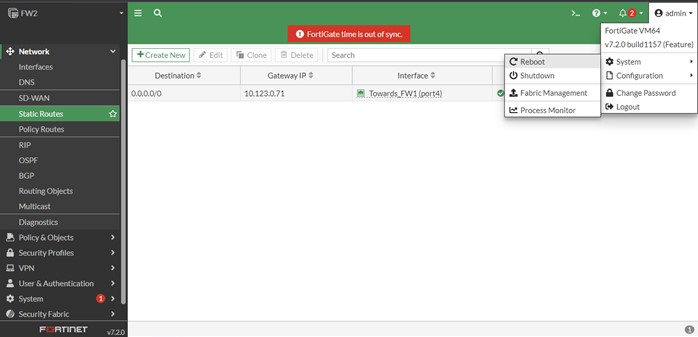
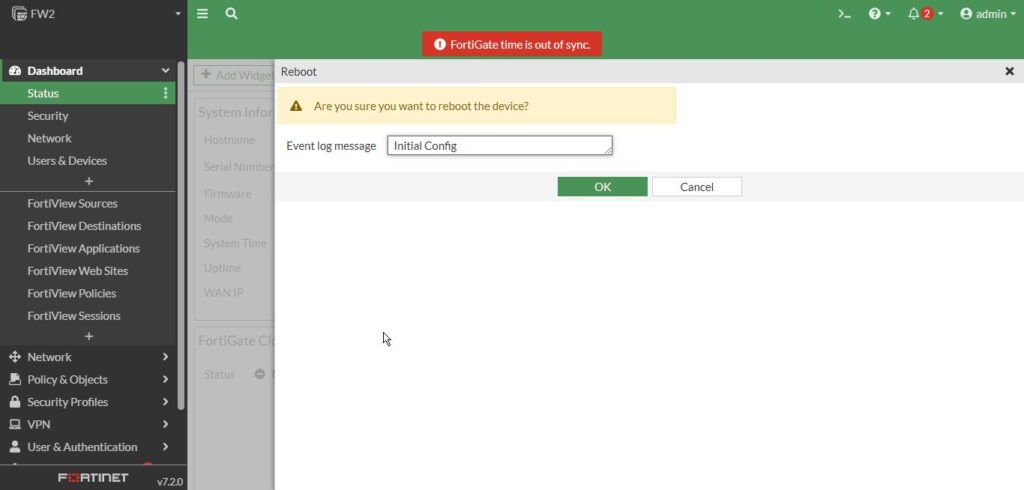
Now the FW2 should reach the internet, and because we have the message “FortiGate time is out of sync “so it is required to reboot the firewall, so click on admin appeared on the right then go down to system and then select Reboot right there, for the logs I write “initial config” then click OK and after just a few moments firewall reboot and ready to use again.
Then
Firewall 3 Network Configuration
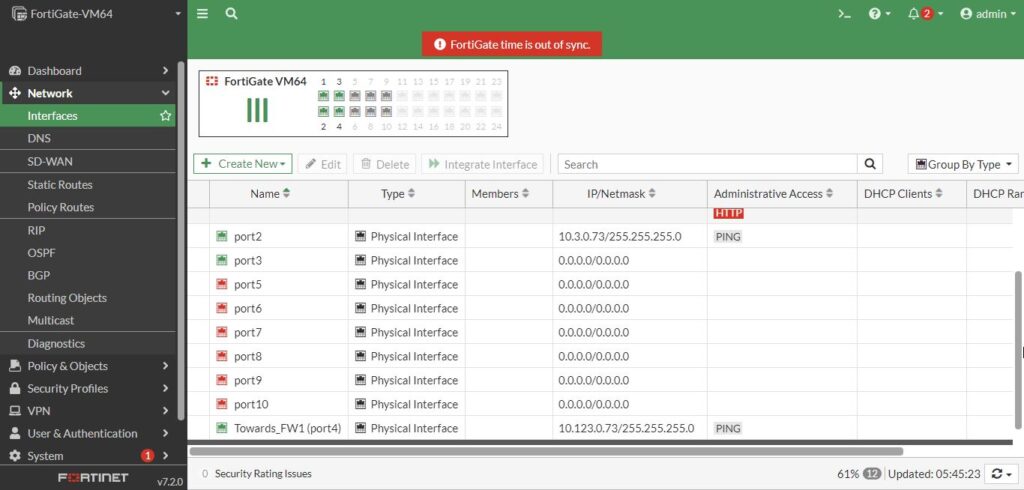
While that is rebooting, I recommend we can go to FW3 and FW4. I guess it is a good practice for all of you to configure these two firewalls. So according to the topology below definitions should be created.
Host: FW3
Port4:
Alias: Towards_FW1
Ip: 10.123.0.73/24
Port2:
Ip: 10.3.0.73/24
And very similar we did on FW2, let’s add a new default route. So, we can have this firewall access network beyond directly connected network.

So now we have default route and let’s go ahead and reboot the system. The reason of rebooting again is that time is out of sync error we have.
Firewall 4 Network Configuration
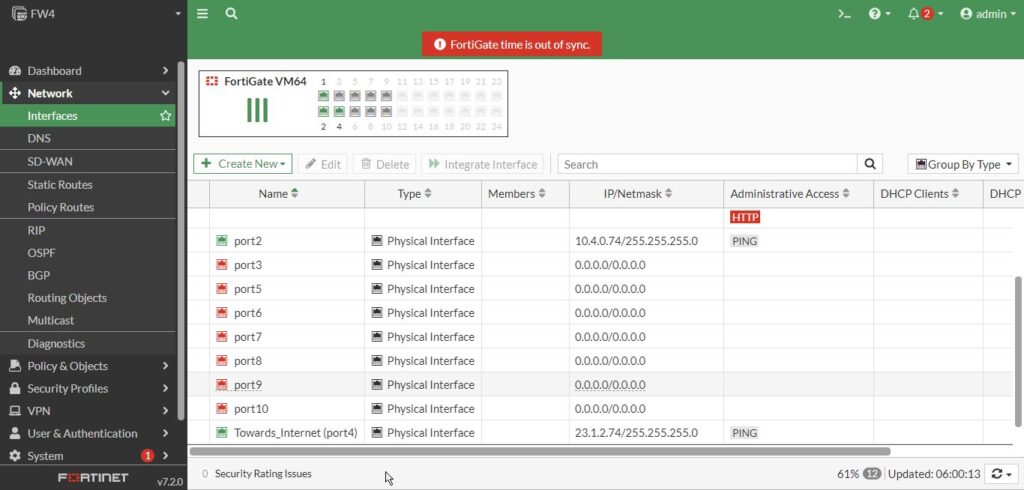
Let’s do the same for FW4:
Port4:
Alias: Towards_Internet
Ip: 23.1.2.74/24
Port2:
Ip: 10.4.0.74/24
Static Route next hob : 23.1.2.1
And default route is set:
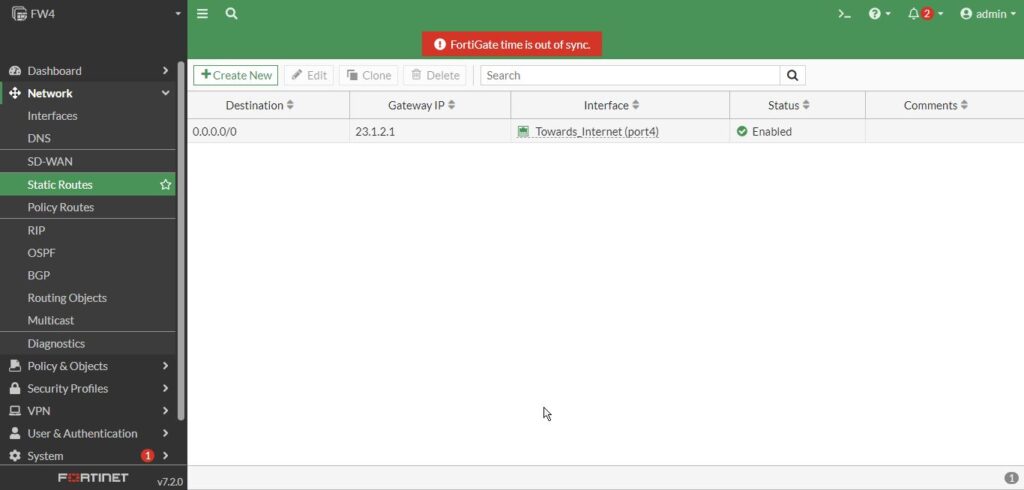
Then again reboot the FW4 for the time sync error.
We can back to all firewall and see we don’t have the errors anymore and also; we can ping 8.8.8.8 (google DNS) in CLI with “Execute Ping 8.8.8.8” syntax and see we have connection to internet.
Now we can shutdown all the firewalls and take a snapshot form all of them for initial config. It depends on how you implement the lab either on ESXi, EVE-NG or VMware Workstation.
Thank you for reading this post. We got the initial bootstrapping and network configuration for all the firewalls. Please follow the next posts with dynamic routing protocols, RIP,OSPF and BGP on the fortigate firewalls.
