
In previous post we talked about windows server 2022, features and the hardware requirements. Now we are going to talk about the installation of windows server 2022 step by step.
At first we should know about the hardware requirements.
Lets dive in!
Windows Server 2022 Hardware Requirements
Before we start installing windows server 2022, we need to know about the hardware requirements that I mentioned below:
- Processor: 1.4 GHz 64-bit processor, 64-bit compatible
- RAM (Storage): 512 MB and 2 GB for server with the option to install Desktop Experience.
- Network: NIC card with a minimum bandwidth of 1 GBPS
- HDD: 32GB
- UEFI 2.3.1c-based system and firmware that supports secure boot; Trusted Platform Module; Graphics device and monitor capable of Super VGA (1024 x 768) or higher-resolution
Step 1: Download the windows server 2022 ISO
This is our first and important part of windows server 2022 installation. You should download the ISO file from the Microsoft website. This file allows you to create a boot media for installing the windows server.
- To download the ISO file, you need to sign up at Microsoft’s official Windows Insider from a web browser.
- Click the windows server 2022 and then select Download the ISO from the options. Click continue.
- In this part you must put some information’s for downloading the ISO. When you put all the parts, click continue.
- Next part is for choosing the language. You can choose between different languages for installing the windows server 2022. When you choose one, click continue.
- Now you can see the download will start and will take couple of hours to finish.
Step 2: Make a bootable device from the ISO file for installing windows server 2022
Now you have the windows server 2022 ISO file, and it is the time to make a bootable device for installing the windows server. You can install windows server on a physical device or on the virtual hosts. If you want to install it on a physical device, you must make a bootable device like USB flash or CD. For making USB flash as a bootable device, you can use RUFUS software.
Step 3: Installing windows server 2022 standard desktop experience
I want to show you the steps of installing windows server 2022 desktop experience and the instructions of this edition and the server core are the same but at the end of installation you don’t have desktop GUI in the server core.
These are steps for installing on a virtual host.
- choose the ISO file for the CD-DVD of your server for booting from it and then power on your virtual machine.
- If you are trying to install the windows server on a new VM the server automatically will boot with the CD-DVD and your installation will come up. If you are installing on a server that is not new and you have an operating system on it, you should go through the boot options and choose the right device for boot.
- After booting up you will see this blue page and this information. You can choose the language and the time and currency format in this page. Select the one that you want and click “Next”.

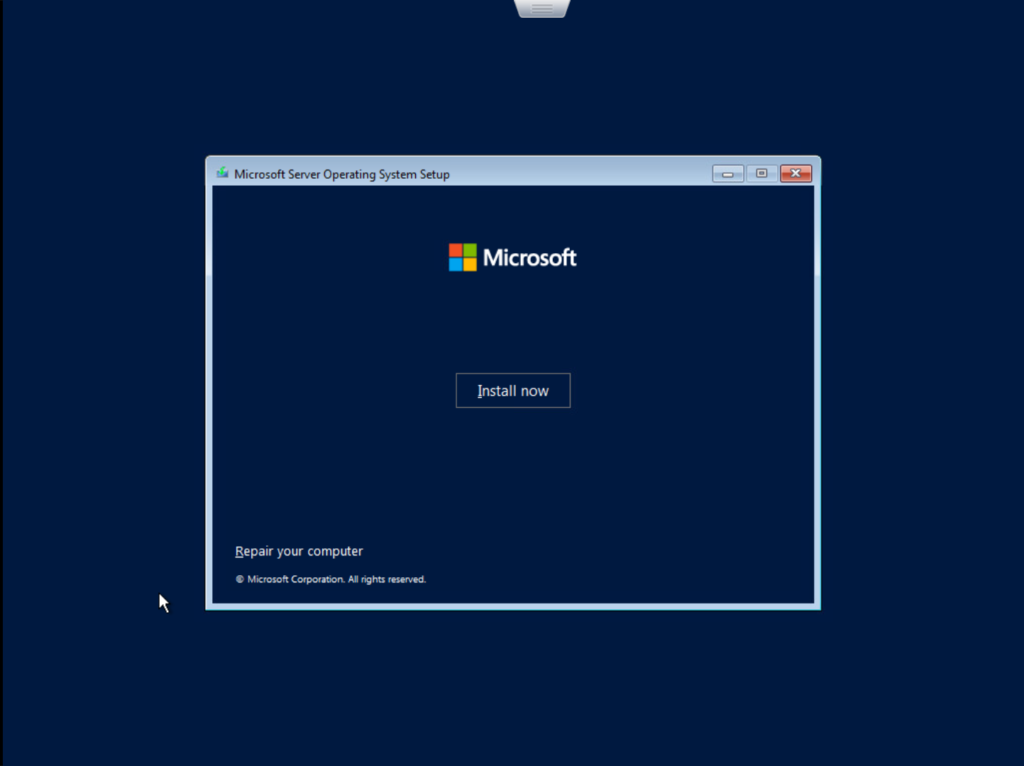
- In the next page just click the “Install now” for continue the installation.
- In this tab you can put your windows license key if you have or you can choose the “I don’t have a product key” and put the license key after installation. Then click “Next”

- This part show you the different editions of windows server 2022. We are going to install standard edition with desktop experience, so we choose the second one and click on “Next”.

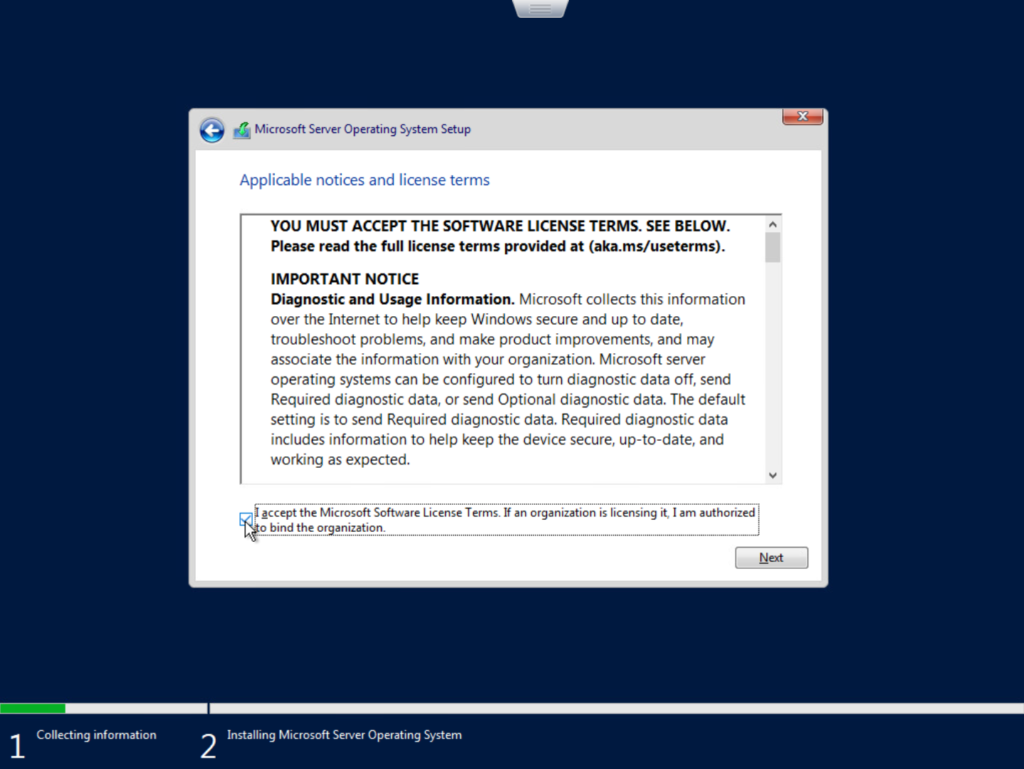
- This is the license terms. Read it carefully and agree to them for the installation process. Press the “I accept the Microsoft software license terms” and click on Next.
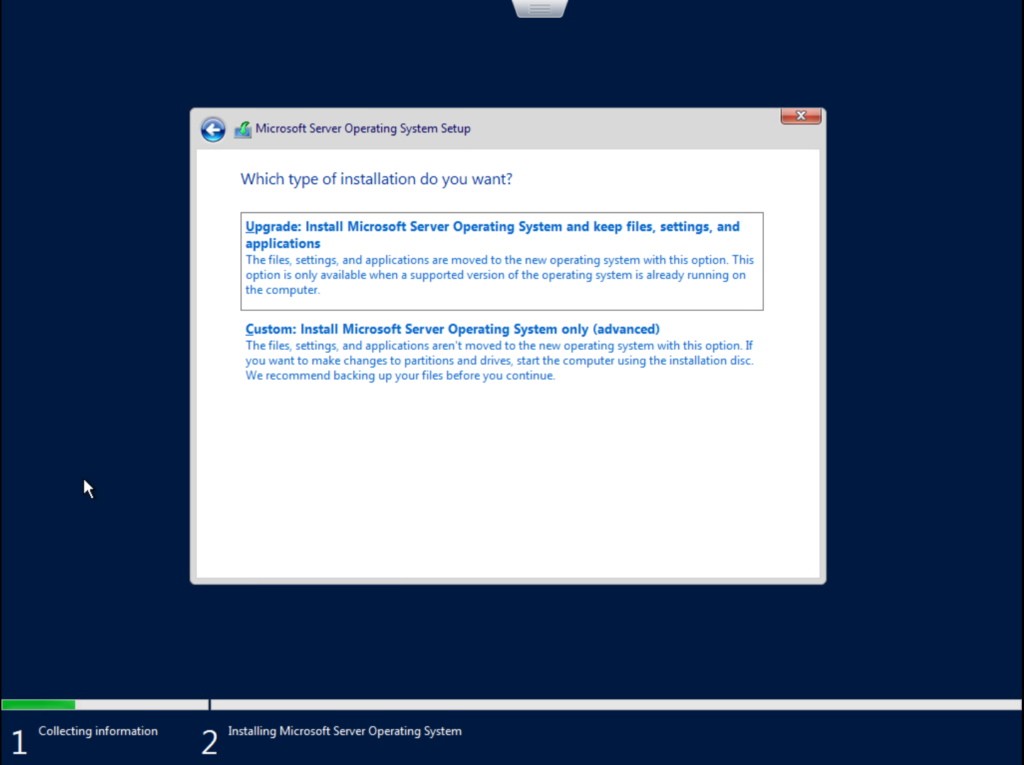
- In this tab we have two options. First one is upgrade. If are upgrading a previous version to this, you can choose this one that doesn’t delete any files in your operating system. Second one is custom. If you are installing the windows server on a new server, you should choose this one. I select the custom option because it is a new server.
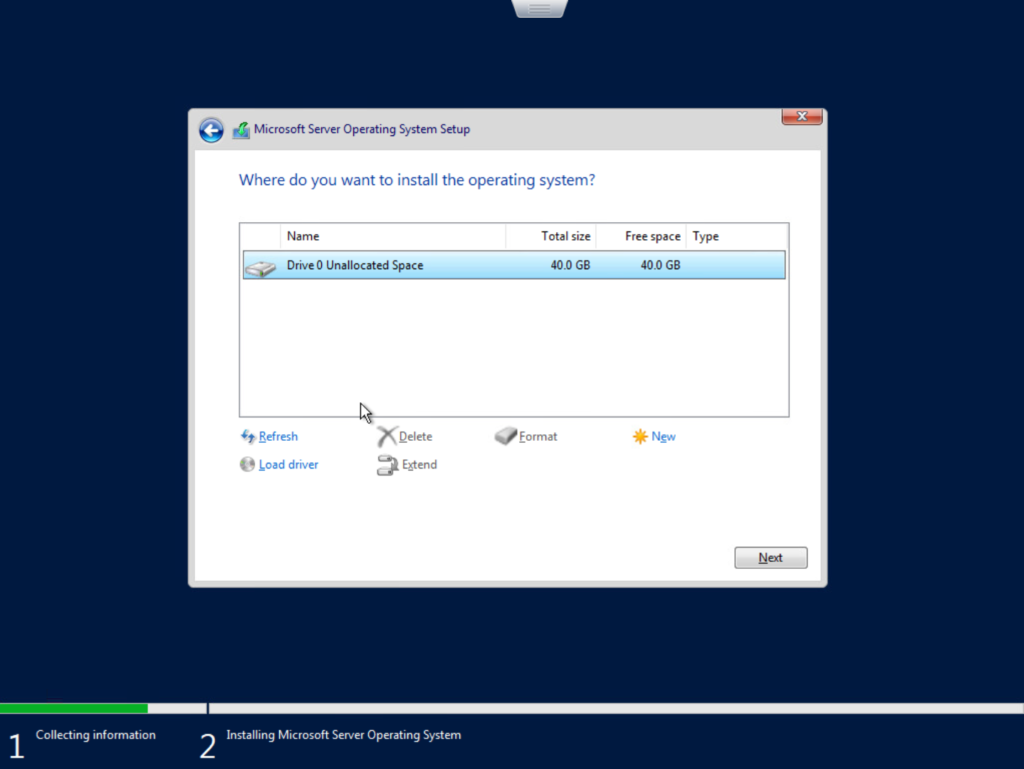
- Now you can see the partitions that you have. Choose the partition that you want to install the OS on it and hit the “Next”.
- The installation started now, and your system will reboot after this installation.

- After the first restart you will see this image and after this processing your system will restart again for finalizing the installation.

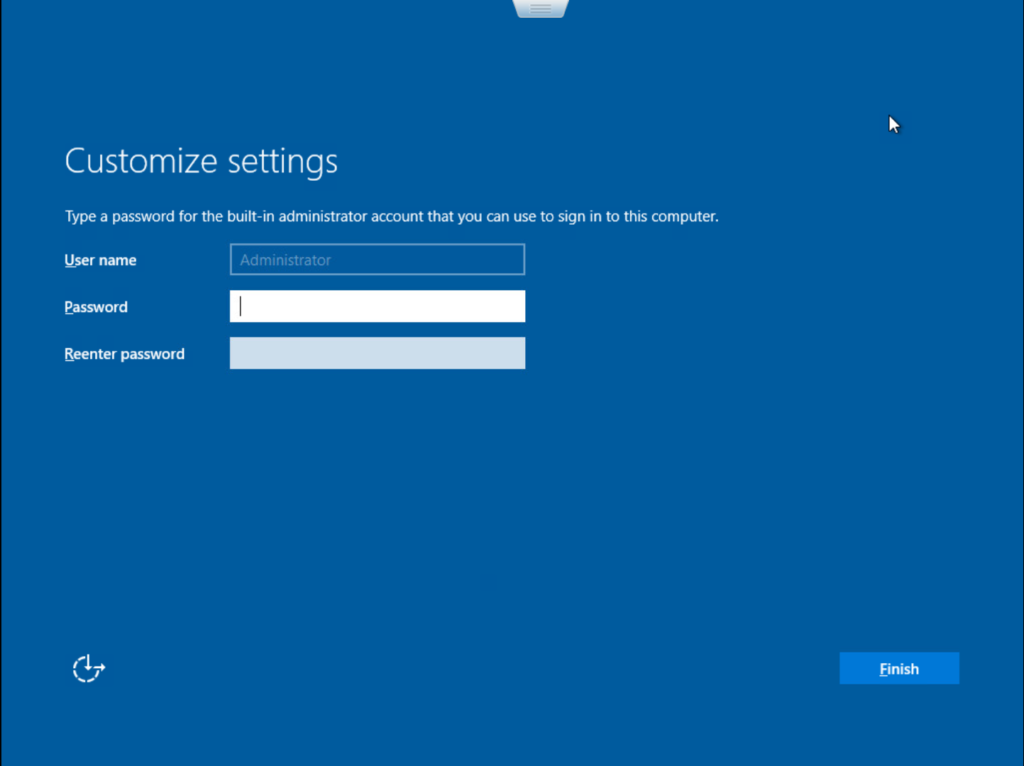
- After the second restart you will see this picture that show you the installation is finish. In this page choose a password for your admin account and click on “Finish”
- After choosing a password for admin account, you will see this picture. This is the login screen for your windows server. Press Ctrl+ Alt+ Del for putting the administrator password and logging to the windows.

After logging you will see the server manager launch by default. Your windows server is ready for you, and you can start configuring your server.
Please stay tuned with me to explore what is the next. Also if you enjoyed this article, please share it with your friend and colleagues!
