
Routing Information Protocol (RIP)
Basic Description
We can remember we configured a static route for VPC2 with 10.2.0.50 that said to the FW1 that if you want to go to that VPC2 forward lower to FW2, and then FW2 makes a routing decision because it is directly connected to that client. For example, if we have a ping request to that PC from the interface of the FW1 with 10.123.0.71 ip address, so it is replied by the pc to its gateway to FW2, then FW2 has the static route for 10.123.0 network and it forwarded back to the FW1.
What happened if FW1 wants to see the 10.3.0 network behind FW3? So, we must have a static route says the next hop is FW3 and then FW3 can deliver it to the VPC3 in that network. So, if had 40 or 50 subnets, we would want to have 40 or 50 static routes! Too tedious! That is why we use dynamic routing protocol even RIP.
Even RIP is not the best routing protocol but much better and more efficient than using static routes. RIP has two flavors; Version 1 and Version 2. Most devices today are going to spot to version 2 cause it can use mass links so don’t have to be consistent across the network and implementing affectively network statements.
We gating RIP on FW1, we want include every interface begins with 10.0.0.0 anything or 172.0.0.0. in our RIP configuration the firewall says, anything begins with 10 it’s included in the RIP. Any interfaces begin with 172 will be included as well.
Here is what we propose to do. Go on FW1 and FW2 let’s enable RIP. On FW2 we simply saying any interfaces begin with 10, that are included 10.2.0 and 10.123.0 networks. On FW1, we do the same thig. Anything starts with 10 is include the part of RIP and also include the 172.16 network. Even though with that 24-bit network (172.16.1.0/24) we could say 172.16.0.0/16. That means RIP simply looks for any interface begins with 172.16. So, any interface match that and also the network is directly connected will be included as a part of RIP.
The network statements that we going to see at the moment are simply qualifiers on which interfaces directly connected networks are going to participate in RIP.
Enabling RIP
Let’s go to FW1 and FW2 and enable routing information protocol. In FW1we go down to Network, and then we go to RIP. We have some options. The first one is Version which by default, starts with V2. Then we have IP/Netmask which we provide the network statement here.
On FW1, if we want to tell it to include all interfaces and directly connected networks that begin with 10, we type in 10.0.0.0/8. Also, we want to include the 172.16.1 subnet, click on the + symbol. We can add yet another network. We add 172.16.0.0/16 which means it is going to care and looking for any interfaces begin with 172.16. Our network includes our 24-bit network as part of the RIP process.
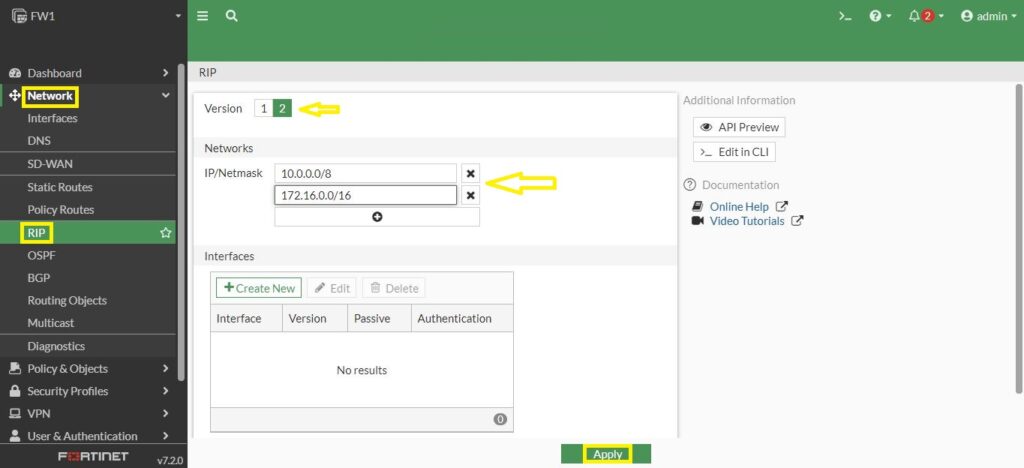
There are additional options, regarding configuring RIP specific ways and passive interfaces with authentication. But by default, all we need to say is version 2 include the networks we want to look out and then click on Apply.
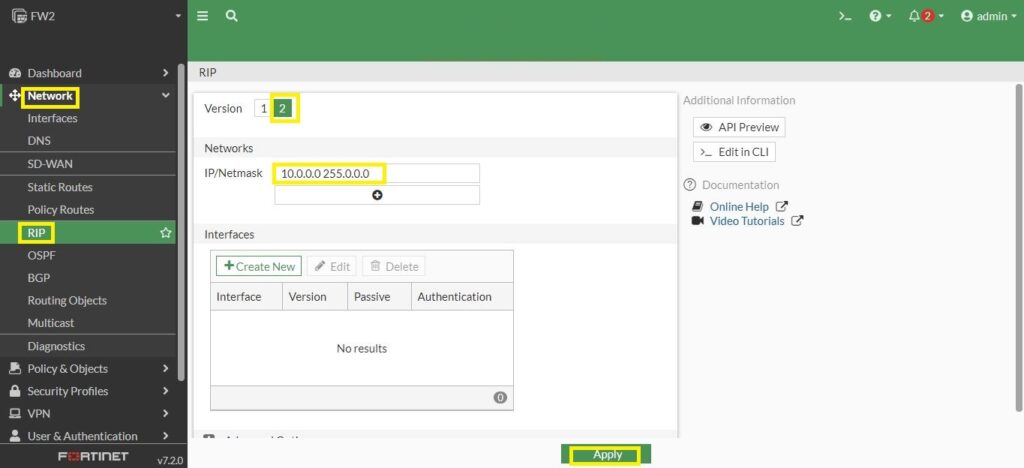
Let’s go to FW2 and include any interfaces begin with 10 as part of the RIP process. All the thing we need to do is add 10.0.0.0/8 and version 2 of RIP:
In FW2 we go to the Dashboard and under that go to Network. Expand the routing to show the details, here we go, we have a RIP one right there in purple.
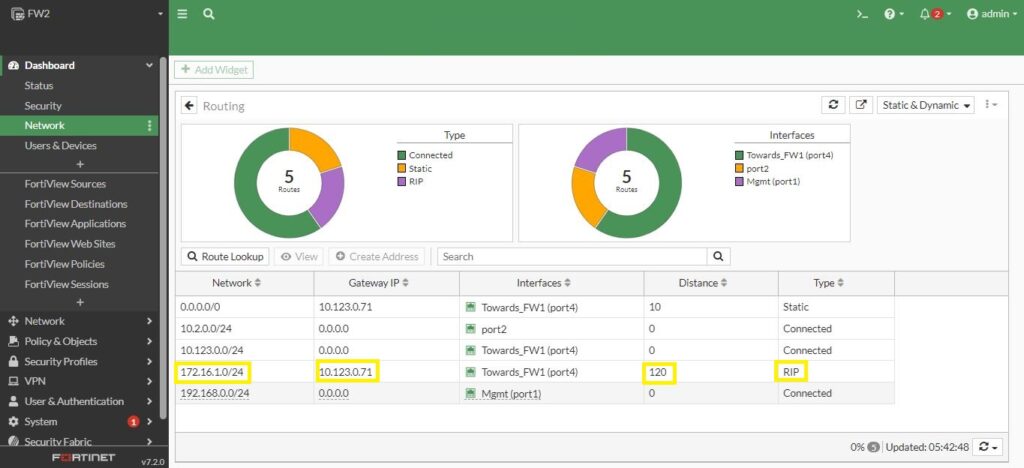
We can see the route we learn via RIP (172.16.0.0/16), next hop (10.123.0.71) and also the Type of how we learn it (Routing Information Protocol). We have also Administrative Distance (120), so if we were for some reason running multiple routing protocols, and RIP was advertising this specific route to FW1 with the AD of 120 which is the default and we have a static route that was also configured for 172.16 network which has the default AD of 10, the static route for that specific route would win over this RIP because has the lower AD.
Check How It Works
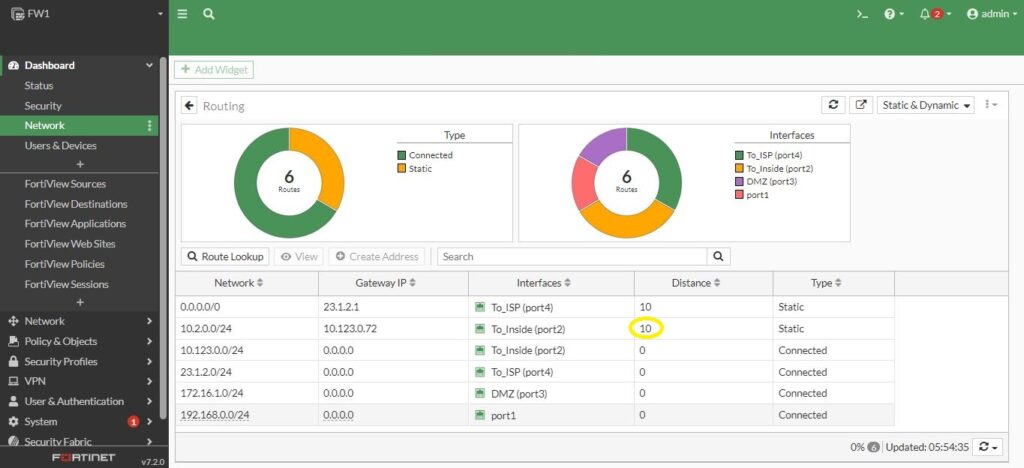
To confirm that let’s take a look at FW1. Go to Dashboard and Network and expand the routing. We can’t see any RIP routing. It is saying that it has a route to the 10.2 network. But it is the static route configured in the previous post https://old.smenode.com/fortinet/static-routes/. That’s because the static route has a better and lower AD than the RIP route. How would we verify that we really are learning the RIP for 10.2.0 or not choosing to use it because static route has a lower administrative distance?
We are going to command line interface and look at the routing database. On FW1 run the command “get router info routing-table database”. This command shows us the routes that made to the routing table but also shows us the routes that didn’t make to the routing table. Let’s take a look.
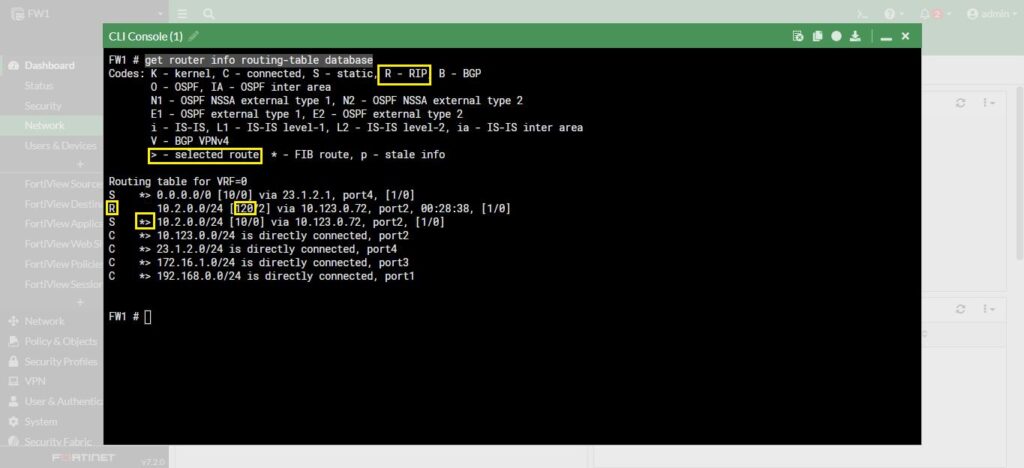
It is showing us that we have the RIP route of 10.2.0.0/24 and it was learnt via RIP. That R is indicator of RIP, and RIP by default has the AD of 120. That’s why the RIP route isn’t installed in the routing table. So, it’s learnt but it’s not being used. Now if we want use this RIP route, we simply remove the competition. The currently static route has a lower AD.
Let’s go to a quick check of the routing table with a “get router info routing-table all”:
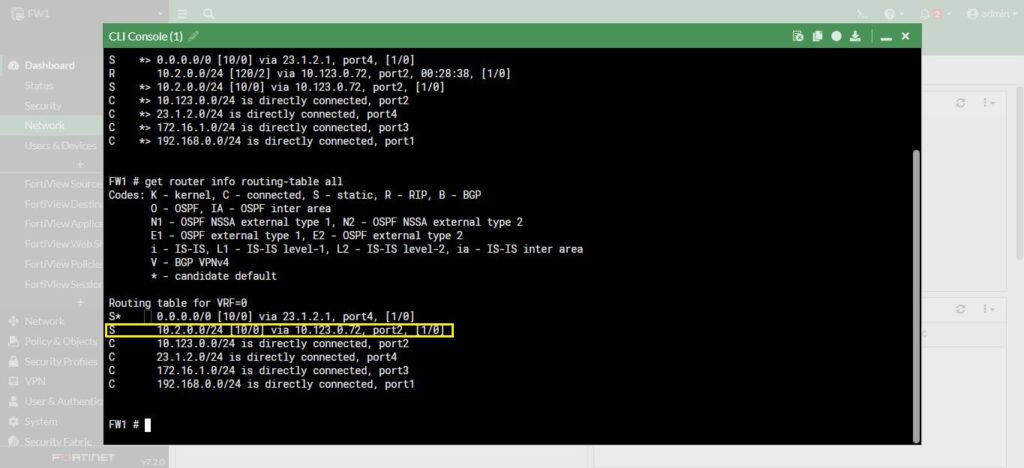
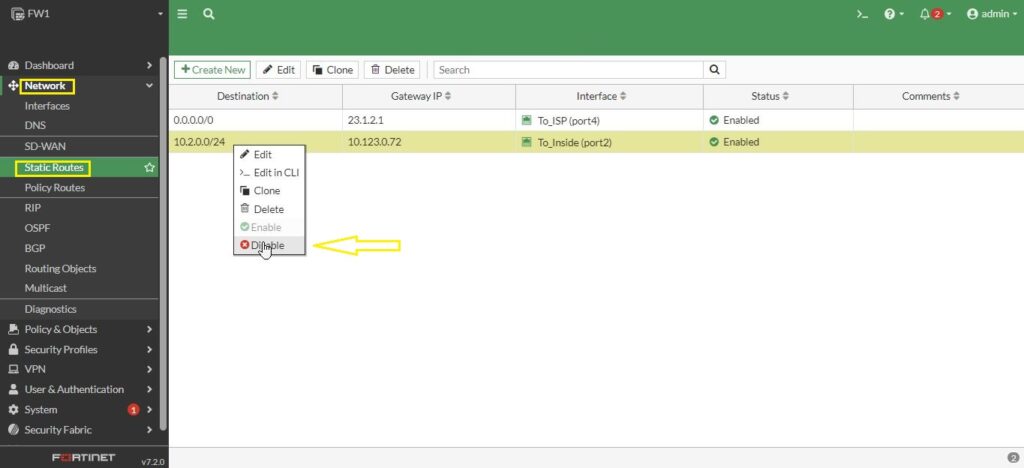
So clearly, we have the static route of 10.2.0.0 network. Let’s disable the static route of 10.2.0.0 in the Network/Static Route. Right click on the route and disable it.
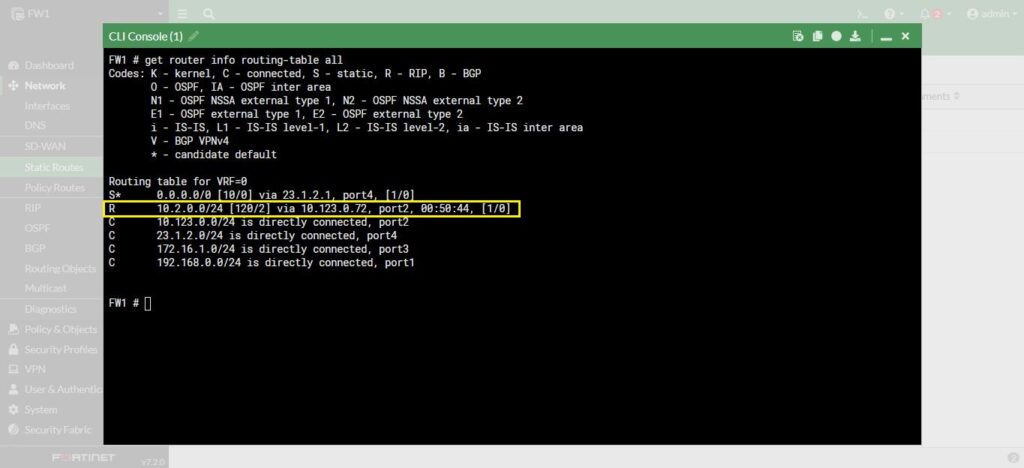
Go back to the CLI, now we have the RIP route in the routing table. Because the static route is no longer enforce.
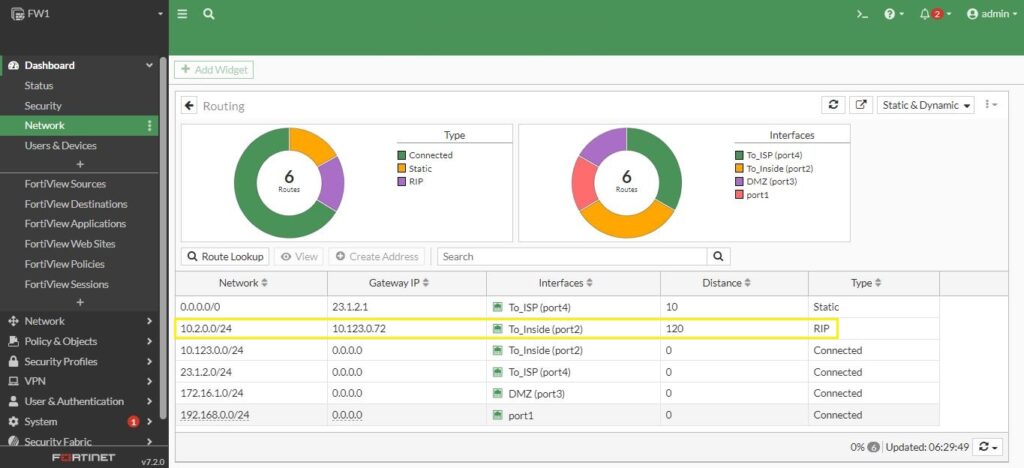
Back to the Dashboard/Network and expand routing, we can see the RIP route as well in there.
In this post we’ve took a look at one of many different routing protocols that we can use dynamically educate routing devices including firewalls and how to reach network to build the routing tables. In the next post we are going to look at a better option OSPF.
